I've been obsessed with wallpaper ever since I used it for the backdrop of a short film that I wrote and produced,
Mouthbreather. It was central to the film's set design and helped me build an appropriate setting for the character of a reclusive cat lady (i.e., me).
Actually wallpapering an entire room is too much of a commitment for me since we rent our duplex and don't plan on being here forever. But that's why framed wallpaper is perfect for those of us who have commitment design issues.
I've been fantasizing about framed wallpaper since I first saw these two images in the now defunct Domino magazine, years ago:
Oh, the florals and birds against the dark background! The chinoiserie of it all! These images make me feel like I'm an old dame living in some French country villa where my pet pugs sit on chairs and I spend my time serving tea, eating macarons, and playing croquette in the garden.
Inspired, I bought a roll of vintage Thibaut wallpaper off of eBay from this
awesome source about half a year ago for $35. It then proceeded to sit in a box in the corner of our entryway for, oh, another half a year. Yeah, I'm an expert at procrastination.

Mainly, I had all these questions: How much would it cost to frame it? Where could I go? Would I have to mount the wallpaper myself? Should I use wallpaper glue or double-sided tape? And most importantly, what's the difference between Greek yogurt and Icelandic yogurt?!?!
A quick Internet search showed me that taking my wallpaper to a framer's would cost several hundred dollars each, especially if I wanted to do large panels. So I decided to DIY it by ordering build-your-own frames online from American Frame. (The frames then sat in the corner for another two months. The instructions looked crazy daunting even though I have a PhD in Ikea.)
But this weekend I decided enough is enough! First I laid out the wallpaper against the mat board...
....and trimmed it down to size with my trusty blade:
The Chinese in me says waste not, want not. Wallpaper scraps can go to covering frames and creating smaller pieces to frame and give away as gifts.
Then, out to the garden to glue the wallpaper to the mat board with some spray adhesive.
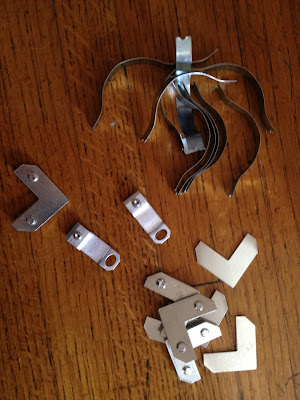
While waiting for the glue to dry, I built the frames, which I didn't photo document since I was sitting in the middle of the floor, surrounded by about 8,000 metal pieces, swearing like a sailor. WTF are you supposed to do with all these metal THINGAMABOBS YO-
Ahhh...fasteners and springs and bolts and whatnot.
Slide the dried wallpaper-mounted board in and ta-da! No need for glass or backing as I wanted the original texture of the wallpaper to be right there. I'd cut two different sections of the wallpaper so that I'd have two varying patterns (even though the bird repeated about every 38" or so). Here's the final product:
By the way, I'm a full-on convert of American Frame now. It's much cheaper than getting your art framed at a framer, and once you figure out how to do it one time, it's easy as pie. The only thing they didn't include for some odd reason was the hanging wire. A trip to the hardware store, a few sailor swears and about ten new nail holes in the wall later, these suckas were hanging over our bed.
The small size of our bedroom makes it hard to take photos, but I did the best I could. A serendipitous discovery: the dark navy of the wallpaper background matches my
refinished dresser, and the grey peacocks match our sheets.
 |
| I swear these cats posed here on their own volition. |
Some bedside table details...
Anemones from the farmer's market, and tinted blue mason jar leftover from the wedding.


