Showing posts with label paper source. Show all posts

Monday, January 6, 2014

Decoupage Experiments

I love me some John Derian. If you've seen any of this New York artist's stuff at local boutiques or home decor sites, you'll know what I'm talking about.


He takes found images from old botanical manuals, vintage maps, etc. and makes all sorts of awesome paperweights and dishes from them. Genius and ecofriendly, right? His home goods shop in the East Village is filled to the brim with these gorgeous little treasures.


You know what's not so genius and Emily-friendly? The prices. His plates usually run about $55-180. For that price, I can buy myself 1/4 of the Rag & Bone boots I've been eyeing! Which would I rather have, boots or decoupage plate? I'll take the Rag & Bone boots, thank you.

Since it's the holiday season, I decided to try out some homemade gift-making with my version of the John Derian decoupage glass plates. I picked up some vintage glass plates at my favorite thrift shop. 6 vintage French glass plates for $2? Yes, please.

First, a silly guinea pig, using my usual kitty inspiration and some Kate Spade wrapping paper...


Success! Sort of...
Onto the real tries. First, I used the holy water of crafting...


...Mod Podge! I decided to take a stab at the square plate, which seemed easier.


Then I cut my fabric to size (the silk Duralee Kalah that I used to reupholster this regency chair):


Using an angled sponge brush, I painted a coat of Mod Podge on the back of the glass plate.


Then, I carefully laid the fabric face down onto the back of the glass plate, directly onto the glue.

How 'bout them nails, eh?

Here's the flip side.


After about 30 minutes, I trimmed the edges with serrated fabric shears (mistake!...don't do this!) and laid down another coat of the Mod Podge over the back of the fabric.


I don't love how the edges show through, but that was a lesson to learn.


Now, an attempt with the round glass plates...this time using a map of Italy.
First, I found the part of the map that I wanted to highlight on the plate...

Va bene, Sicilia.
Traced the edges and cut out the dish shape with scissors. Since it's a circle shape with slightly curved edges, pasting would prove molto difficile. So I cut that map into slices of pie...

How I wish this were blueberry pie.

...that would overlap when pasting the paper onto the curvature of the glass. Again, a coat of Mod Podge and the same ol' rigamarole...


One hour after drying, this plate looks pretty damn bellissimo!


Here's another I did with that same Kate Spade wrapping paper. I stamped it with a gold ink ginko stamp in the center, which isn't very visible.


I then spray painted the backs of the dishes with my trusty gold Rust-o-leum, for a classier finish...


Once I got on a roll with these, they were pretty easy to make. I ended up making a bunch, using both found materials and pretty paper I got from Paper Source. I found that fabric was the easiest to work with since it bends and curves along with the dish. Also, in the future I'll stick with square plates.


I originally bought this lovely fabric to reupholster the regency chair with, but changed my mind when I saw it in the living room. Which left me with a yard of fabric to play with! I didn't take any pics, but I used a bright pink paper decoupaged over the back since I love the pairing of pink and green - makes me think of prep school.


Next time I head to the flea market, I'll look for some vintage botanical prints that I can use for my second foray into decoupage. I ended up gifting all these plates above with a personal note...


...but I kept my favorite dinky one for myself.


It makes me laugh every time I look at it.
I still haven't perfected the art of decoupage, but at least I'm 25% closer to those Rag & Bone boots.

Wednesday, August 21, 2013

Apartment Therapy Style Cure Week 3: Organization Porn

For those of you who've been charting my Style Cure progress, I really have been doing the Apartment Therapy Style Cure these past few weeks, but I haven't had much time to blog about it due to auditions (And some juicy ones too! Nashville, Revolution, Anger Management...I can't complain). These weeks have been filled with assignments like "Shop til you drop!" and "Toss and organize." Easier said than done, especially when I'm focused on other stuff. I've slowly been slogging through all of these tasks, with limitations, of course -- we don't actually have enough space in our office to possibly get all the storage we would actually want in here. The room quadruples as two busy people's home offices, line dry laundry hanging space, and a guest room. So, while I would like to get as much feng shui flow in here, the reality is I only gots a 121 square feet. What's a girl to do?

Well, downsize and organize.

After my (failed) floor planning stint, I decided that moving the furniture around would be impossible, given the space we have. So I've made do with small improvements--with ginormous results.

For example, I just slogged through four years of old sides (scripts) from auditions and organized them into these adorbs notebooks from Target:


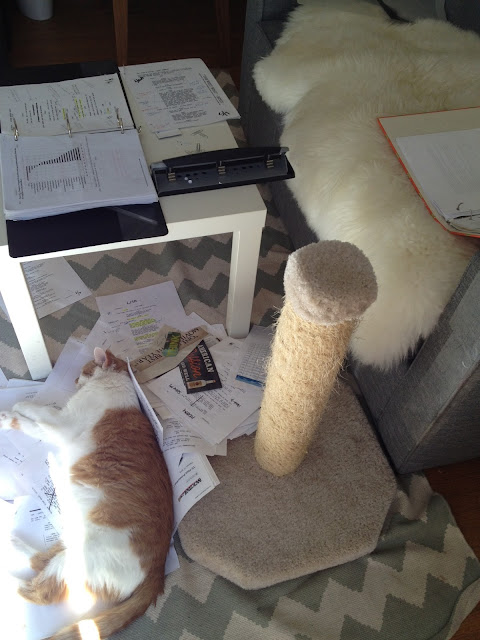
It's always hard for me to throw out sides...it's like a little memento of all the characters I get to transform into. It was actually kind of fun, looking back on all the weird and cool things I've auditioned for--indie movies that never got made, TV pilots that turned into huge successes (Revolution, Lost, Chicago Fire), and scenes I ran in class that frustrated the hell outta me at the time but now I look back and see right through it. By the way, turns out old sides make for a pretty comfy cat bed:


Remember this awesome leaning tower of paper-za?


I know, I know.
I finally sorted through my boxes of acting postcards, head shots, mailing labels, envelopes, and every possible size of printer paper, and sprung for this cool drawer organizer from Ikea, which doubles as a printer stand and cuts the floor space needed in half. It's aptly named "Alex."

I'm the man of your dreams.
Aah! Doesn't that feel soooo much better? As for our crazy overstuffed bookcases...

Heart. Attack.
God, it gives me agita just to look at this photo. It's. Got. To. Go. Really. I mean, the orange jersey from Key & Peele? The Gummo poster? (As cool as those are, they don't necessarily need to be on display.) The hanging laundry? The book cases? I painted that wall a dark dove gray hoping we could contrast it with some cool white furniture, but it's mainly been obscured by these black Billy Ikea bookcases. I really would've liked to switch these out for white ones, but for now, these will have to do the trick until we move into a house. I considered painting them, but the thought of dragging them outside and having to lay them on their sides sounded like a huge pain. So I settled on making them a little cheerier.

Made a weekend trip to my fave place Paper Source and found me some bright, cheery patterned paper and lined the backs.


Once I put these up altogether, I didn't love the pattern so much anymore. It's more floral and dowdy than I want. But I figured most would be covered up anyway by the books, and hey, it was only $21. I didn't worry too much about lining up the pattern since I knew books would be there:


Used some horizontal stacking and some objects like this vase to break up the lines. I love seeing all the colors of the book spines side by side.

Then I took those gattdam miles and miles of DVDs and Blu-rays clogging up our bookshelves and finally shelled out for their own little condo, using this unused corner:


That one's still in progress, as you can see. But I'm learning now. The key to success is storage, storage, storage! I'm pretty sure that's what the real punch line to that "How do you get to Carnegie Hall" joke is.
Phew!